It is that time of year when we have or are in the midst of buying and making gifts for everyone on our list.
Voila!
Then, we take a deep breath of satisfaction for having bought them all, and the wrapping panic begins!
Personally, I don’t get that panic anymore. Over the years, I have made dozens of different sized fabric drawstring bags for wrapping gifts for family and friends. For a few years, I had to make a few bags to fit those items that I just didn’t have the right size bag for, but for the last several years, I have not had to make any. It makes wrapping a breeze. Drop the gift into the bag, pull the drawstring closed. DONE! OK. I do have to safety pin on a permanent name tag, but that is really it. It takes only a few seconds to wrap each gift. Ahhhh.
All my recipients know that they have to return the gift bags to me if they want a gift next year and I have lost one or two bags over the years, but it works out really well.
I have also been known to purchase pillow cases (at the thrift store or at the dollar store) to wrap gifts in. I particularly like the ones that close with a zipper.
There are however, certain recipients that I just don’t feel comfortable asking for my bag back. They do not get fabric bags. They get beautiful, handmade gift bags and containers made from recycled materials. I make gift bags and packaging from run of-the-mill junk mail and newspapers.
To make the gift bag
Materials:
- Recycled newspaper or flyer
- Find a box that the paper you are using can wrap around comfortably. The length of the box is irrelevant.
- Scissors
- Tape
- String, ribbon, yarn, etc.
Click on the first photo to see a manual slideshow of all the steps.
-

Materials needed to make your own recycled gift bags: newspaper or flyers, box, invisible tape, hole punch, string and scissors
-

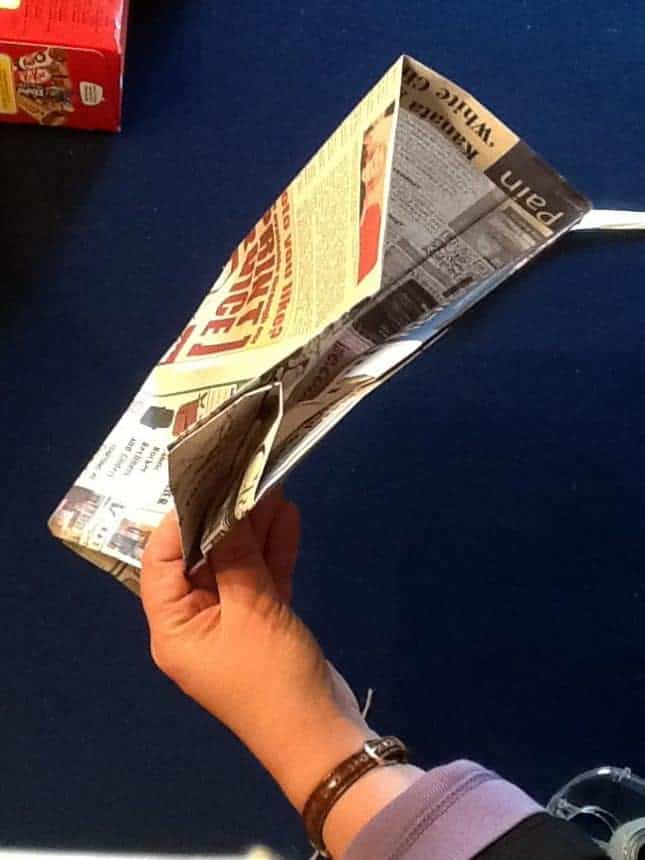
Turn the top edge of your bag over by 3/4" (1.5 cm).
-

Double check to see if the fold is straight. Make another 3/4" (1.5 cm) fold to produce a strong border
-

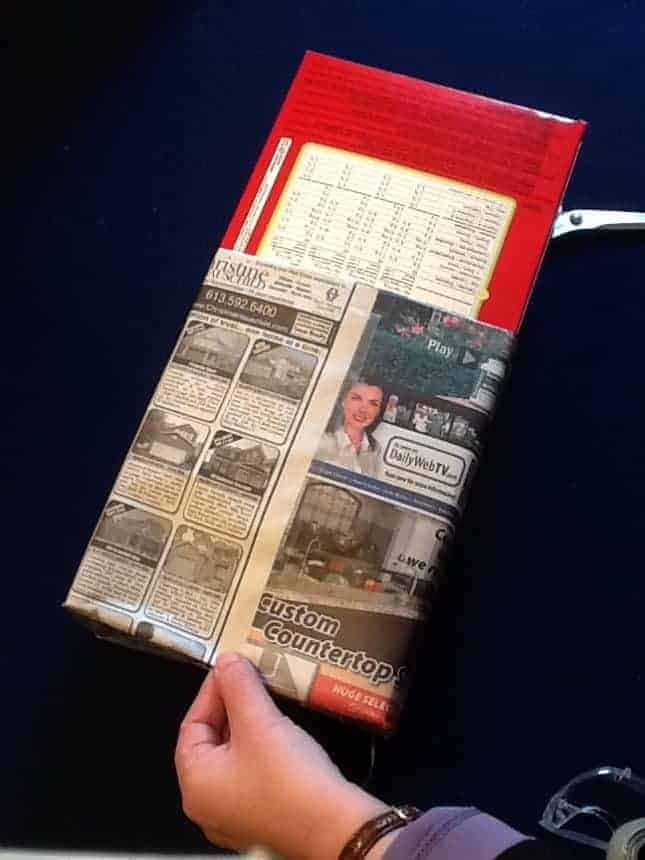
Wrap the paper around the box and secure the two shorter edges at the side with tape. I usually tape from underneath as well as on top.
-
Fold the bottom of the bag as if you were wrapping a present. Tape all the seams.
-

Pinch all the folds between your fingers to produce crisp creases.
-

Do that to all the edges while the bag is still on the box.
-
Carefully, pull the bag off the box. This may be a bit tricky, you may get a vacuum effect.
-

Again go over the creases making them nice and sharp.
-
Tape the inside folds now, if you did not do it during construction.
-
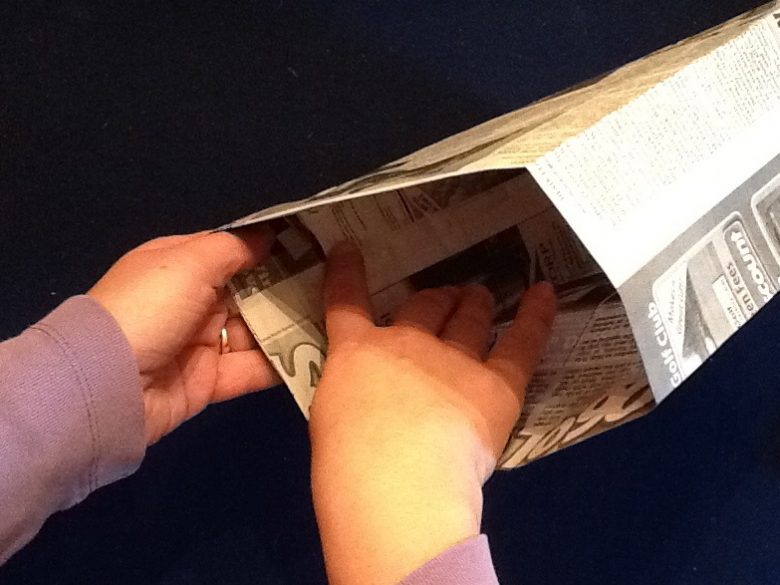
Bring the two folds together at each side, pushing the excess paper into the bag. Crease.
-

Flatten and fold the bag.
-

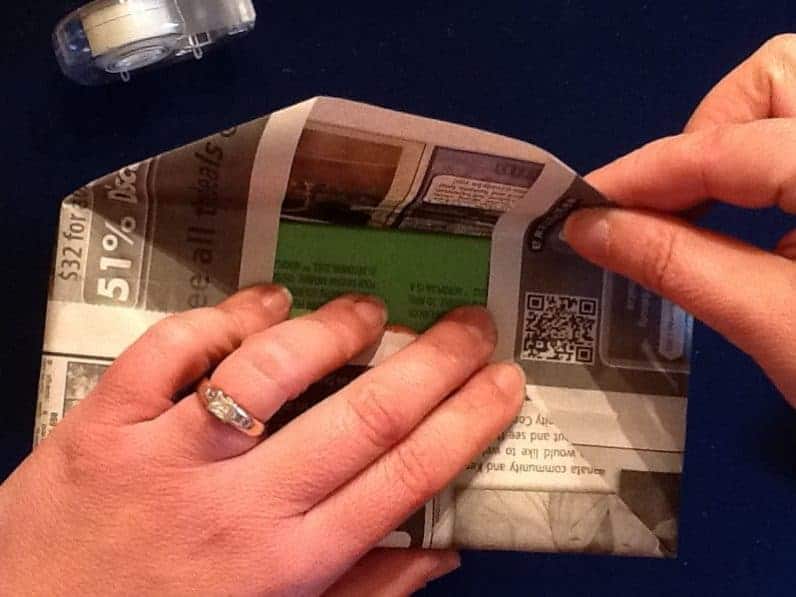
Put tape to reinforce the areas where you will punch your holes (two on each side and in between the folded sides).
-

Tape both the inside and the outside of the bag.
-
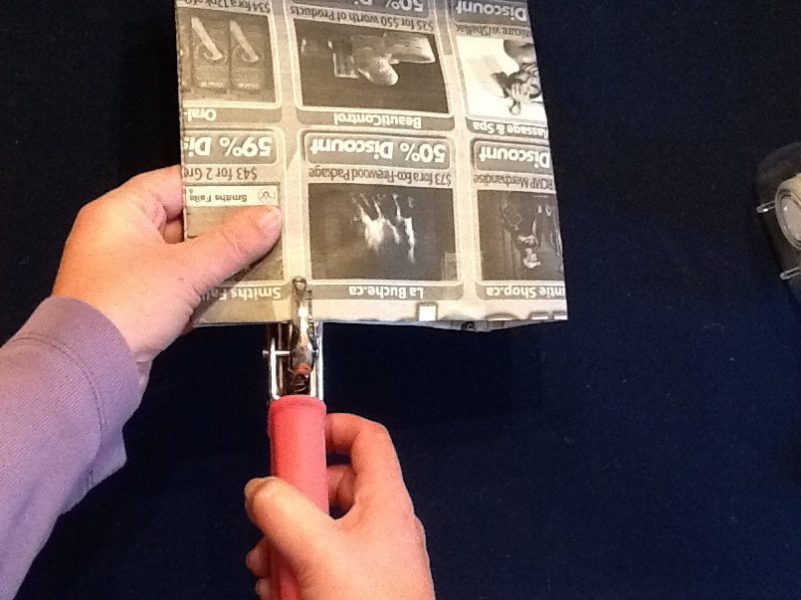
Punch through both the front and the back of the bag at once (if your hole punch can handle it) so the holes line up.
-

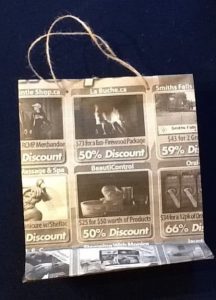
Tie the string around the box you used and add about 4" (10 cm).
-

Thread the string through the four holes in a circle.
-

Tie the string tightly.
-
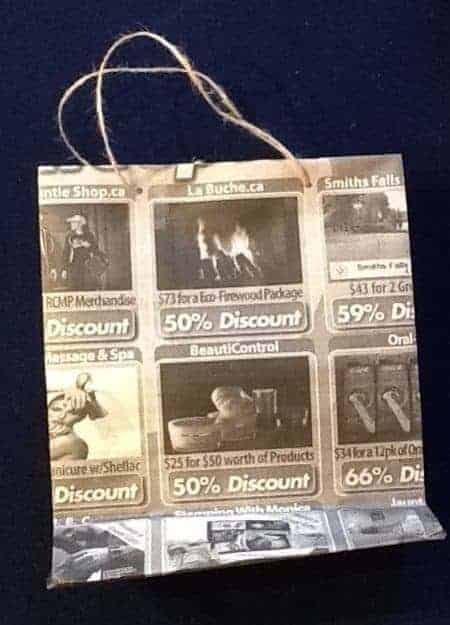
Voila!